Showing posts with label sourdough. Show all posts

Wednesday, February 8, 2017

Just Make A Batch of Sourdough Bread!

I am calling this post, Just Make a Batch of Sourdough Bread, because sometimes you need a little encouragement. We all need it sometimes.

I have been running low on some granules of Valentina's and Babo's San Francisco Sourdough Starter. My last post was of a batch of bread using Valentina's because I reactivated her and once ready spread the starter on a large plastic tray to dry and since Valentina's was now active I also made a couple of batches of bread and made pancakes too a few times.

Next I activated a batch of Babo's. In fact, right now I have four loaves baking in the oven and it smells oh so good. 

Valentina's and Babo's both come from San Francisco but they are different. Babo's needs a little more care after making the dough. I let the dough rest for twelve to fourteen hours in a cool environment of about 60-65 degrees F before dividing into loaves. I then let the loaves sit at 80 to 85F for a couple more hours before placing in the oven.

I use the same basic recipe for all of my sourdough starters:

1 Batch of Starter doubled in size 
3 Cups room temp water
1 to 2 Tablespoons Salt*
8 or 9 Cups Unbleached Flour

I combine all the ingredients in my Bosch mixer and let the machine run for ten minutes after the last of the flour is added. Pour 90 percent of the starter into the mixing bowl. You only need a little starter left in the jar when feeding it. I am not of the school that says to only use half. In my opinion that is ridiculous and can lead to weak starters. By using all but some scraps in the jar you are promoting healthy vibrant sourdough starters.

Then I remove the dough and place in a large plastic Tupperware bowl that has been sprayed with cooking oil. Then I place the lid on top but not sealing it and let the dough rise overnight. The next day I divide the dough into 4 or 5 round loaves and place on a tray that has been lightly oiled and sprinkled with a little corn flour. 

In my oven I have a Travertine tile from Lowes that I pre-heat to 450F. I also have a small cast iron frying pan that I pour in 2 cups of boiling water. Wear large oven mitts for this because you may burn yourself at this stage. Always be careful. 

I either transfer the loaves to the travertine directly or I just lay the tray I am using on top of the stone, add the boiling water and then close the door and reduce the temperature to 400.

Making your own homemade sourdough bread is very rewarding. If you would like to order one or all of my starters you can click here.

* Use of Salt for those on a salt restricted diet. Check out Chef Don's Megaheart.com site for his sourdough recipes.

Pictures of today's batch of bread are coming.


Babo's SF Starter
35 Minutes in the Oven so far


Thursday, January 19, 2017

Restoring A Sourdough Starter From Long Term Refrigeration

Restoring A Sourdough Starter From Long Term Refrigeration

I like to store my sourdough starters in the fridge and I tend to do it long-term without feeding. Whenever I am ready to reactivate a sourdough starter I take it out of the fridge, stir the liquid on top back into the starter and scoop out a small spoonful. I then drop it into a jar and add one cup all purpose white flour and three quarters cup water which is about 70 degrees F. It will feel just barely cool to the touch. Then I stir it all together and loosely cover my jar and then place it in a good location that's not too cold. In this case I chose my mantle above the gas fireplace because it was about 65 degrees. My kitchen is about 50. For this sourdough starter I used tap water. Your use of tap water may get different results.

Look at the photo below. This is my old Valentina's (Wasatch Willy's is similar) after a day and a half! From the fridge it takes roughly 36 hours to become fully active. You can tell the starter is going to be ok because after 12 hours the sourdough starter is stringy. I stir it up and dump it down the drain leaving about a quarter cup still in the jar. I feed it and let it sit for another 12 hours. Then after 12 hours I dump out most and feed it again. Within the next 12 hours it will be very active.

Click here for ordering info.

My Valentina's San Francisco Sourdough Starter.

Monday, March 16, 2015

Fresh Sourdough Today from Wasatch Willy's Great Salt Lake Sourdough Starter

I made a fresh batch of sourdough bread today using my exclusive Wasatch Willy's Great Salt Lake Sourdough Starter.

Normally I make boules but the last two times I made bread I have been too lazy so instead I used my nice long Norpro pans my daughter bought me. Came out fantastic.


I have mentioned the recipe several times before in this blog but I'll repeat it for those who would rather just see it now and not have to search for it.

Ingredients:

1 batch fresh Starter (at least 8 hours after feeding)
3 cups water
8-10 Cups Unbleached White Flour. DO NOT USE BREAD FLOUR.
1 Tablespoon salt

When I say one batch I mean dump it all into your mixer bowl. Do not scrape the jar. After dumping most of it out go ahead and feed it. You do not have to save half like most Traditionalists will tell you.

Mix the starter, water and salt together until blended. Start adding flour one cup at a time. Until AFTER the dough comes away from the bowl. Knead for ten minutes.

Place the dough in a greased large plastic bowl and lightly cover and let it sit for twelve to sixteen hours in a cool place. I like to use our basement because it is always cool enough down there all year long. You can place it in the fridge but be prepared to let it sit for at least 24 hours or more until the dough hits the top of the bowl. I use one of those large Tupperware bowls. We have the older and the newer Tupperware bowls. The older bowl is wider and not as deep and the dough always hits the lid. The newer large bowl is deeper and the dough never hits the lid.

When the dough is ready to divide into loaves I like to turn on the oven at 350 for a minute and turn on the light. This prepares the oven for the loaves to sit and rise until ready to bake.

I usually divide the dough in thirds. On my scale that's about 850 grams per loaf. Divide the dough and place in loaf pans. Cover with a damp cloth and let rise in a warm place for a couple hours.

If you used the oven to let your bread rise take it out and move your oven racks to the bottom two slots and heat your oven to 450 F. Place a small pan on the bottom rack. You are going to pour two cups boiling water into this pan after the oven is heated up and after you put the bread in the oven,

Be sure and use a Lame to score the tops of your bread before placing them in the oven. This is really easy if you make boules. If you use bread pans like I did it's more of a challenge unless you use more dough per pan.

Boil two cups of water.

Place your bread in the hot oven.

Wearing oven mittens, pour the boiling water into the pan and close the oven door.

Reduce the heat to 400 F and set your timer to 55 minutes. It takes a a lot longer to n=bake a loaf of sourdough.

When done, remove from the oven and let it sit for 20 minutes, The bread will continue to bake in the middle of the loaf.

Enjoy!

To order one of my sourdough starter packages click here for more info.

Tuesday, February 17, 2015

Always Make a Backup!

I have been dealing with computers since before the first IBM PC was introduced and one thing I cannot stress enough is, ALWAYS KEEP A BACKUP! Someday that hard drive is going to quit working and today we have access to the Cloud via Google Drive, DropBox and others. But when it comes to Sourdough we have to rely on simpler methods to make a back up.

Let's face it, things happen. Right? 

What are some of those things? Bugs, heat, feeding and so much more can affect our starters which is why I always keep a small jar of starter in the fridge. It does not take much to reactivate a starter that's been stored in the fridge and my experience tells me a starter will last almost forever in the fridge.

Here is how you do it.  When you feed your starter and you normally dump it down the drain instead pour it into a small clean canning jar and tightly close it up. Use a canning jar with appropriate lid. Fluid will separate but don't worry about the fluid. 

To activate a starter from the fridge, scoop out a heaping tablespoon of cold starter and place it in a quart canning jar. Add 1 cup flour and (room temp) 3/4 cup spring water. Stir it up. Let it sit overnight and dump out half. Feed it another cup of flour and 3/4 cup water. Let it sit again. It does not hurt to feed it every twelve hours when reactivating your starter. Most starters will be very active in less than 36 hours.

Are you old enough to remember yeast cakes? A small package of yeast stored in a foil wrapping? When starter has been stored in the fridge for a while it has that consistency. Shows my age I guess.

All my starters (except two) use normal unbleached white flour. I do not use bread flour because I find my breads do better without the added wheat gluten. The exception to this rule is Chef Don's Megaheart Starter. He created his starter from grapes grown in the California foothills of Auburn, California and he used bread flour. I have tried to wean his starter off of bread flour to no avail. The other starter does is based on an Organic Dark Rye flour (Tara's). 

So remember! Keep a back up in the fridge, no matter what. I use these flat canning jars because I can stack them three to four high on the shelf in the fridge.

How To Order My Sourdough Starters

Monday, January 26, 2015

Barb Geiger Makes A no-KNEAD Bread

How to order one of my starters - CLICK Here

Customer Barb Geiger commented:

Hi!

My first loaf was horrible – I added gluten to make up for the whole wheat and my dough was too wet to handle. It tasted fine and it had a lot of holes, but the crumb was more of an epoxy than anything else. I was trying to make no knead sourdough but my traditional no knead recipe needed some modifications. My second loaf was crackly and perfect, but I gave it away. But my third loaf was absolutely perfect and completely no knead and I didn’t have to share it with anyone. The tang was there in the back of the mouth and the crust and crumb were perfect. It’s even 30% wholewheat and you’d never know it for the taste and the softness and the crust is the best part of all.

I’ve made my own starter before, but nothing with this sourness. Thank you so much! I’ve been using the discard to make sourdough waffles on a silicone waffle pan nearly every morning which have been amazing, but I have three more pounds of sourdough bread dough in the fridge that just need to be formed into loafs and baked off. This is amazing, thank you!


I asked her to share her method and recipe.

Absolutely! It’s not mine, I found the technique on the net, but I had to make some adjustments. It seems complicated, but there’s a lot of hurry up and wait in this. Total work time is about 10-15 minutes and this dough lasts in a container in the fridge (with a hole in it) for up to two weeks, and the longer it sits, the better it is. It’s a variation of the Jim Leahy version of no knead bread and the artisan bread in 5 minutes technique by making more than just a pound at a time. I’ve used the 1-2-3 sourdough by Flo Makanai to use a sourdough starter instead of the ¼ tsp yeast per pound or so of flour. My addition is not shaping the dough at all. Using the frying pan and parchment paper technique was taken from artisanbreadbystev from youtube. I’ve only stood on the shoulders of giants and combined all their methods. Lots of steps but very little actual work. Maybe 15 minutes or so of you having to do something for the overnight process. Flour does its own thing, and the longer you let it sit, the yummier it gets. Everything in the supermarket uses chemicals to replace time, and that time is going to pass whether you have bread dough on the mantle or not.

It’s based on the 1-2-3 method, so:
one part of sourdough starter
2 parts dechlorinated water (I used a pitcher of water that’s been sitting on the counter for 3-4 hours and if I run out of that, bottled water)
3 parts flour (This was 50 ounces of white, 10 ounces of whole wheat)
Then the flavor additives:
1 loaf uses about a pound of flour, so for every pound of flour I try to use
1 ½ tsp of salt
2 tbs of honey
(If you’re using whole wheat, you can throw in a tsp of gluten. Totally optional)

Step 1: test your starter. If it produces enough CO2 to float in a cup of water, you’re good to go. If it can’t, add add 1/8th tsp yeast, jik per pound of flou. Early starters may need it, advanced starters will not.

Step 2: Feed your starter. I read somewhere the thicker your starter, the more sour the dough. I like feeding it 2 parts flour to 1 part water. This is an add some to some recipe. Wait 3-4 hours until it’s really bubbly and ready to go. The thicker the starter, the more sour it’s going to taste. Weigh your starter. This is your official part.

Step 3: Add twice the weight of your starter in declorinated water and your salt, sugar and yeast (but only if you have to. This recipe relies on trust in the process)

Step 4: Add three times the weight of your starter in whatever kind of flour you need. Most of it should be white bread flour. Try keeping it 80% white, 20% whatever, but add a tsp of gluten if you have it. If you don’t, don’t worry, your bread flour has lots of protein in it to carry the whatevers to bread perfection

Step 5: Mix in your flour. You’re going to have two different reactions to the mix: Oops! This is going to be soup, then 30 seconds later you’re going to think it’s going to be way too dry. If you have a Danish wire whisk, use it. We’ve been using an oatmeal spurtle. Back of wooden spoons work, too. Depending on how wet your starter is, you might need to add another ½- ¾ of a cup of water, but don’t worry if it’s terribly shaggy. That’s good. If it’s too runny, you’re going to get an epoxy hockey puck at the end result. The flour should be mixed up and you could probably add that last bit of water just to get the dry flour off the bottom, but don’t worry. This will work.

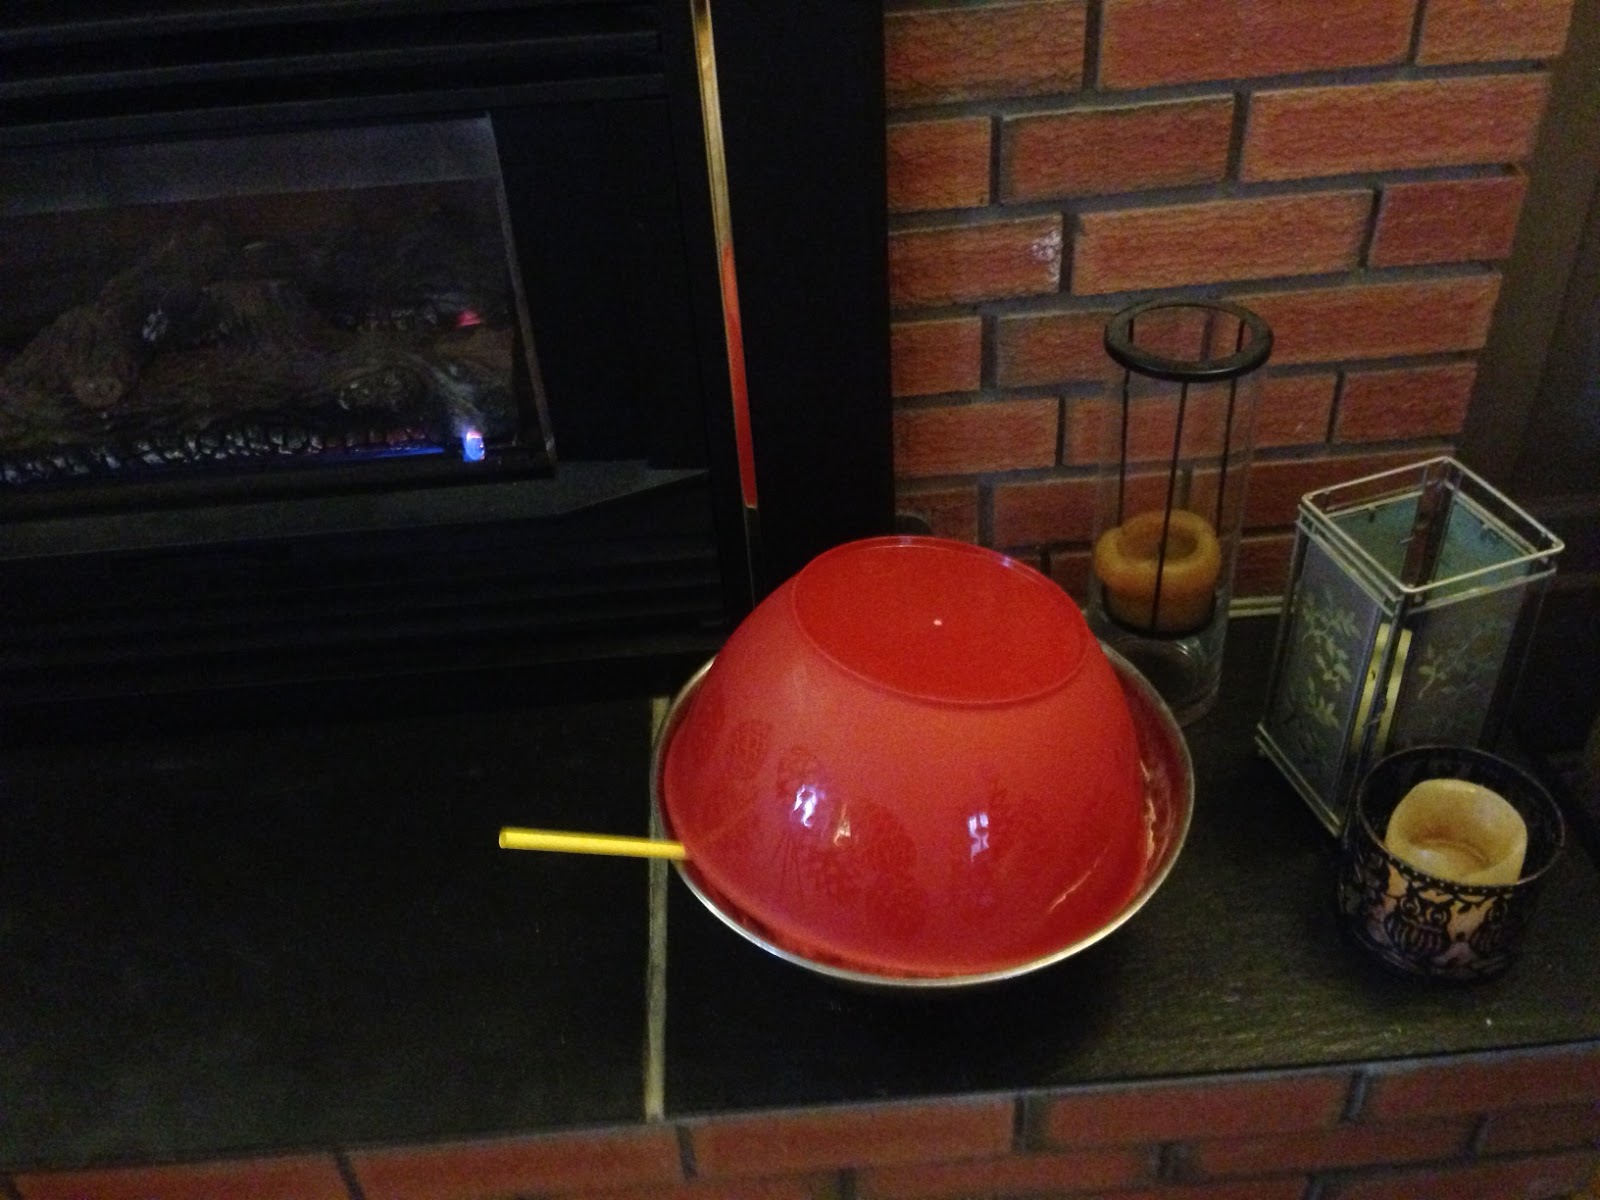
Other than feeding the starter, steps 2-5 should take less than five minutes. Cover your beast, name it something kindly, and put it somewhere warm. We keep ours on the mantle in a big bowl with a plate on top of it and a straw to make sure Herman can breathe. See attached bread dalek photo. I’ve since switched to a Tupperware with a whole in it.

Let it sit in the warm spot for 12 hours or overnight. I live in Canada and I have unheated an unheated boot room, so when it’s cold in the winter time, I put Herman outside in his Tupperware container once he’s been sitting out. You can leave him at room temperature for 18-24 hours, but that worries me. Sourdough is specifically meant to be kept at room temperature for ever, but any time you’re dealing with an agricultural ingredient, food safety should be #1.

Step 6: Take out a bread size lump. A lot of people suggest folding or rolling or pinching to make him be a better bread shaped thing, but I degas him in the Tupperware, put the piece of parchment paper down on a non-stick frying pan, and stretch him out as far as he can go and the dump him in the 10” skillet. I dust him with more flour, cover him with another parchment paper, and wait 3 hours with the bread dough, now named Herman Jr. on the mantle. If he’s not been chilled at all, you only need an hour proof or so. To the point where you poke him and he doesn’t get huffy and push that dough right back out at you.

Step 7: After Herman Jr. Has been waiting three hours and has formed a nice dry crust around him, I heat up my enamel cast iron pot. I’ve tried a 3 quart that fits him perfectly and a 5 quart which seems too big, and he does way better in the too big pot. Heat the oven and the pot for 30 full minutes @ 500 degrees. I keep a pizza stone in the oven to keep the oven hot.

Step 8: When the oven’s ready, slash Herman open with something (I uses scissors…usually, in the photo he’s un slashed. Slashing the loaf gives oven spring more of a chance, but he turned out perfect as was). Then open the door, gather up the edges of the parchment paper Herman Jr’s been resting on, drop him in the cast iron pot gently, cover and bake for 30 minutes. I’ve kept the oven @ 500 and at 450 and it doesn’t seem to make a difference.

Step 8: After 30 minutes, remove the lid and the parchment paper from under Herman, turn oven down to 350 degrees, and bake 10-20 minutes. 10 minutes if he’s a smaller loaf, 15 if he’s bigger, 20 if he’s huge. The darker he is, the better he crust. If it goes a very dark brown, don’t worry, he’ll taste amazing. At home chefs don’t let things brown as much as professional kitchens do, and brown is where the flavour is)

Step 9: THE MOST IMPORTANT STEP. Wait for Herman to cool ALL THE WAY DOWN before slicing. I know hot buttered bread is engrained in our DNA, but the starch in Herman is still in a gel-like state. Popcorn starch goes from a gel to a sold in milliseconds. Bread starch takes longer. If you absolutely need to have that fresh from the oven scorching hot melted butter experience, make buns instead so you’re only sacrificing one to the gummy-gods, not your whole effort.

I know this seems like a lot of steps, but most of it is hurry up and wait. Feed your starter, wait, add water, honey, salt, and mixing in the flour is about five minutes of work, and that’s the hardest part. The bread should be cooked by the pound. The cooking seems complicated, but you get the hang of it. Take about a pound of your dough, let it rise a second time in a warm place. Preheat oven + pot with a lid, slash bread, put bread in pot, wait 30 minutes, uncover and take paper away, bake 10-15 minutes, rest it. It’s about 10 minutes total time, you can do it on a Saturday/Sunday then have bread dough in the fridge for the next two weeks.

It’s amazing what you can do when the dough’s just waiting for you to use it. You’ll never order pizza again when you can have the most amazing sourdough crust on your table in under an hour, 40 minutes of which is allowing the stretched dough to rise and 10 minutes of that is cooking. Real Italian pizza is just bread dough and cheese, and when you taste this, you’ll understand why it doesn’t need anything else. This is simple enough to let the kids shape the dough after school and have it ready for you to cook when you get home. Teenagers can put the pot and the lid in the oven and turn it on to high, but I really suggest the adult be the one to actually gather up the parchment paper and put hot things in hot places.


How to order one of my starters - CLICK Here

Wednesday, January 14, 2015

How Long Does It Take to Get My Order? and Biscuits!

For those of you in Canada, in case you are wondering how long it takes to get your order, here is a note I received yesterday from Barb in Lethbridge Alberta  Canada. Her order was shipped on the 29th of December and she received it on 1/12/2015. Her order was for all ten of my starters. In all it took 14 days. 

From Barb on 12/27/2014
"I’ve been looking for a sourdough seller for years! I didn’t realize you could ship it across the border. I was so happy to find you!..."

From Barb on 1/12/2014

Hi, Bill!

Your package arrived today! I’ve never been so excited to receive a powdered substance in the mail before! Your packaging so well done! Also, I realize now every sentence but this one ended with an exclamation point and I’m usually a lot more reserved with my punctuation. This is going to give me so much enjoyment. Thanks so much!

Barb
Lethbridge Alberta

How to Order one of my sourdough starters.

Biscuits
If you like biscuits and sourdough you will love my Sourdough Biscuits. Pre-Heat to 375F/190C

Ingredients
2 Cups fully active Sourdough Starter
1-2 Cups Flour
1 Tablespoon granulated sugar
1 teaspoon Baking Soda

You need an active and bubbly starter. Any of my sourdough starters will do. In a large bowl combine all ingredients. Stir until you have a soft dough formed. The amount of flour used depends on the consistency of the sourdough starter.

Knead the dough briefly on a floured surface. Fprm it into a square about ½ inch thick and cut with a biscuit cutter. Place the biscuits on a greased cookie sheet. Cover and let rise in a warm place for an hour.

Baking Your Biscuits: Place in your pre-heated oven and bake 20 to 25 minutes until golden brown. Remove from the oven. Brush the tops with melted butter if desired. Serve away!

Sourdough Biscuits

Sunday, December 21, 2014

My Sourdough Starters Make a Terrific Gift

My Order Page is HERE

I have sold a lot of sourdough starters over the last two years and have not yet had an unhappy customer. Admittedly, sourdough may not seem like it is for everyone. For example, if you live in a hot climate like a couple of my customers in Costa Rica, it is almost impossible to work with due to the heat. Other areas of the US it works best in winter, especially for those of you down south. This may be why over fifty percent of my sales are to folks in Canada.

Currently I have ten starters in all with one of them being a non-sour starter meant for basic bread baking. All of the starters are professionally packaged and come with two sets of instructions (On the back label of the packet and included with the recipes).

There are many different ways to use sourdough as the recipes on my blog and those included with the instructions can attest to. There are also many recipes available by simply doing a Google search. One of those recipes, HERE , was recently recommended by customer John Combs.


Try just one starter for only $4 ($4.70 for Canadians - postage costs more). You cannot go wrong. If you need help making up your mind try my very own Wasatch Willy's Sourdough Starter and then go from there. You will not be sorry or sad you did. I guarantee it. My Order Page is HERE

Anyway, I hope you have a Merry Christmas and a Happy New Year.

Bill Karoly
aka Wasatch Willy

Friday, November 14, 2014

Three New Starters and New Buying Options

Three New Starters!
I have added three new starters:

Sierra Gold - From California Wine Country
Quinn Hartley's Kern County Sourdough Starter
Chef Don's Megaheart Sourdough Starter


New Purchasing Options!
I have also added new purchasing options. You can now buy just one, any two, any four or all ten starters.

11-17-2014
There was a problem with the four pack ordering for Canadian customers not working but it is now fixed.

Order Here

Recent Loaves Using Quinn Hartley's

Thursday, October 23, 2014

Three New Sourdough Starters

I now have three new sourdough starters. All are from California. They are:

Sierra Gold 
Made from wine grapes from a vineyard southeast of Sacramento, California in the the Sierra Foothills. Has a Mild sour taste and gives a lively rise to any sourdough recipe.

Chef Don's Megaheart.com Sourdough Starter
This is from grapes grown near Auburn, California. I would call it a medium sour and it too has a good lively rise action. I recently made pancakes with this starter and they were delicious.

Quinn Hartley's Kern County Sourdough Starter
The south central San Joaquin Valley is home to some of the largest table grape growers in North America. Quinn Hartley's sourdough starter comes from some of these grapes grown up against the Sierra Foothills. It has a nice sour smell and taste and is very active.

These starters have now been added to the Order Page.

Enjoy. 

Wednesday, August 13, 2014

My Sourdough Method is Different - It's Not A Wet Process

My style of making sourdough is different than what some might think of when they envision a loaf of sourdough. I would love to make sourdough the wet method way but it requires space in the fridge and frankly that is something we just do not have right now so instead I do it the dense loaf method. For me it works.

If you want the large holes throughout your loaves then you will need to go that route. My starters will work just fine for either method because many of my customers are doing just that. 


Wasatch Willy's Sourdough - A Fresh Loaf

The only thing missing is the most wonderful sourdough smell. But for that you can order your own starter and try it for yourself. I suggest ordering my Wasatch Willy's Great Salt Lake Sourdough Starter and Best Darn Old Alaskan Sourdough Starter. It is only $5 for the two in the USA or $5.70 in Canada. When you order you get recipes and activation instructions. 

When making bread with my sourdough starters do not use bread flour. Use unbleached all purpose white flour only. You can also use wheat flour as well. Keep in mind wheat flour intensifies the sourness of the bread and you may want to shorten the fermentation period of the dough. White flour fermentation is normally about 12 hours between 65-70 degrees F.


Monday, August 4, 2014

A New Easy Sourdough Hamburger Bun Recipe

Tomorrow we decided to have hamburgers for dinner and I decided to try a different recipe this time. I saw one recently posted online at Mother Earth News and this recipe is the inspiration.

You will get about 24-4" hamburger buns from this recipe.


Ingredients:

  • 4 Cups Wasatch Willys Sourdough Starter fully active and stirred down before measuring
  • 1 Cube butter
  • 1 Cup Milk
  • 4 Eggs, Beaten
  • 2 Teaspoons Salt
  • 4 Tablespoons Sugar
  • 7-8 Cups All Purpose Flour


Sourdough Hamburger Buns

In your mixer bowl combine the starter, softened butter, milk, beaten eggs, salt and sugar. Blend with your whisk attachment until smooth - like pancake batter. Replace the whisk with your dough hook and start to add the flour until the dough bunches up nicely and moves around the bowl. Run the mixer for about ten minutes.


Remove the dough from the mixer and let it rest for ten to fifteen minutes. 


Grease and sprinkle two baking sheets with corn meal.


Briefly turn on your oven for about 30 seconds at 350 and turn on the light. Turn off the oven but leave the light on. Boil a small pot of water.


Divide the dough in half. Using a rolling pin flatten the first half of it out to about 1/2" thickness and cut out with a 4" circle cutter. Place the cut out dough onto the prepared baking sheets. Repeat for the second half.


Place the baking sheets and the small pot of boiling water into the slightly warmed oven for about two hours to proof the buns.


After two hours remove the baking sheets and the pan of water. Turn on the oven to 375F and bake for about 18 minutes. Having a baking stone will help to brown the bottoms of the buns. I found my buns came out brown on top but pale on the bottom. 

If you so choose you can prepare a watered down egg wash before baking and sprink.e the buns with sesame seeds.


I used the egg wash on both batches of my buns. One was with seeds and one was plain.


For more info on my Sourdough Starters
click the More Info Here button above or click here.

Friday, August 1, 2014

Making Sourdough Bread Is Not Rocket Science

I started this blog in early 2012 and I regularly post articles praising the ease of baking with sourdough. I am constantly giving loaves of bread to my friends and almost always they remark, “Oh wow! That takes a long time to make, right?” and I invariably reply, “No, not really.” So what I am saying is do not be intimidated. The actual time you spend making sourdough itself is not that much because the majority of the time is spent by the fermentation process.

Sourdough can be intimidating until you get to know it. It’s a mind game really. There’s the feeding of the Starter, the initial making of the dough, the fermentation process that can take twelve or more hours and then the rise time. 

If you have a recipe that calls for yeast you should run away from it as fast as you can. Sourdough, if the starter is a good one, does not need added yeast. The flavor of the sourdough comes from the fermentation process and adding yeast robs it of that process, hence robbing it of the flavor as well.

Sourdough bread is really a simple recipe. Essentially it consists of the starter, quality water, salt and flour. That’s it.   I bake my bread in round loaves because they are the easiest for me to form and they fit in the oven better and I bake them on travertine tiles cut to fit on my oven rack. Not having a pizza peel I use a large steel spatula and place my loaves on aluminum foil coated in cooking spray and dusted with corn meal.

Here is my recipe. I usually make it in my Bosch mixer rather than by hand these days but when I was younger I would not shy from from doing it by hand.

Sourdough Bread Ingredients:
  • 1 Cup Wasatch Willys Sourdough Starter Fed and bubbly
  • 3 Cups Spring Water room temperature
  • 1 tablespoon salt
  • 8-9 Cups Unbleached All-Purpose Flour
In your mixer bowl combine the active and bubbly starter, bottled spring water and salt. Mix until blended using the dough hook. Add the flour until the dough no longer clings to the sides of the bowl and springs back to the touch. Run the mixer for another ten minutes. 

Remove the dough from the mixer bowl and place it in a lightly greased bowl and cover it. Place it in a cool spot for at least twelve hours. I use my basement. In the summertime my basement is about 70 degrees and twelve hours seems to work perfectly but in the winter it’s closer to 60 and sixteen to eighteen hours is the average fermentation time.

Once the dough has fully risen to the top of the bowl and the fermentation time is up, remove it from the bowl and divide it into loaves. I use a digital scale to measure the dough into four equal parts. 

Form the dough into a ball and flatten it on your prepared surface. Then start grabbing the edges and pull it to the center forming a ball until the skin is nice and tight. Be careful not to pull too much or the skin of the dough will start to rip. Place the ball gathered side down onto a baking sheet sprinkled with corn meal. Allow enough space for the loaves to raise but not touch each other. 

Score them with a sharp knife or lame in a cross pattern and cover with a damp cloth on top of the stove.

Now place your oven racks on the bottom two slots. If you have a small cast iron frying pan place this on the bottom rack. Set your oven to 475. If you have travertine tiles in the oven I suggest rather than using a baking sheet, cut aluminum foil into squares and use that instead. That way you can place the loaves directly onto the tiles and your bread will bake more evenly with a nice browning on the bottom.

If your kitchen is warm, it should only take an hour and a half for the bread to raise enough to pop in the oven. Before you do, however, boil two cups of water first. 

Place the loaves in the oven. Wearing an oven mitt, pour the boiling water into the pan on the bottom rack and slide it to the middle of the oven with a spatula. Close the oven door.

Reduce the oven temperature to 400F. Bake about 60 minutes. I have found my bread comes out perfectly with a nice thick reddish crust. I do not bother with either an egg or corn starch wash because I like my crust natural and crunchy.

Place the loaves on a cooling rack and allow at least twenty minutes to cool before slicing into them. 

Of the starters I sell on my blog, my favorites are my Wasatch Willy’s and the Best Darn Old Alaskan. Both are unique and I really enjoy the flavor they provide. 

Variation: One of the variations I like to do is add Kale to the Best Darn Old Alaskan. I go out to the garden and grab a handful and put it in the blender with the starter and some of the water until liquefied and then proceed with my standard bread recipe. The starter feeds off the Kale and gives it a Turbo Boost making it very flavorful with a green tinge.

My Starter

Baking on Travertine

A Lovely Loaf

Look At That Slice!


The Kale Option

Kale Blended

Kale Added

Kale Sourdough Bread Dough


For more info on my Sourdough Starters
click the More Info Here button above or click here.

Thursday, July 31, 2014

Sourdough Carrot Cake Sublime with Cream Cheese Frosting

There was a time I would never have imagined making a cake with sourdough starter and now, after making this Carrot Cake and the Sourdough Chocolate Cake, I don't think I will ever do it any other way. This cake is delicious! I encourage you to try it and to do it with my Wasatch Willys Sourdough Starter which is an Original Great Salt Lake product.

This is an easy cake to make. I suggest preparing your cake pans in advance and pre-heating your oven to 350°F.


The Cake - Part One
1-1/2 Cups Vegetable Oil
2 Cups Granulated Sugar
1 Cup Wasatch Willy Sourdough Starter Unfed from the Fridge
2 Large Farm Fresh Eggs
1 Cup Crushed Pineapple - Drained
2 Cups Grated Carrots
1/3 Cup Pecans - Chopped
1/3 Cup Shredded Coconut
1/3 Cup Craisins or Raisins
2 teaspoons Real Vanilla

The Cake - Part Two
2 1/2 Cups Unbleached Flour
2 teaspoons Cinnamon
1/2 teaspoon Salt
1 teaspoon Baking Soda

Cream Cheese Frosting
1, 8-ounce Package Cream Cheese - Room Temp
1 stick Butter (1/2 Cup)
1 teaspoon real Vanilla
3-5 Cups Powdered Sugar
1 teaspoon Lemon Juice
Scant Buttermilk if needed


Part One: In your mixer bowl, combine the oil and sugar and the un-fed Wasatch Willy starter you pulled from the fridge and mix until just blended. Mix in the farm fresh eggs, one at a time (beat well after adding each egg). Add in the pineapple, carrots, pecans, coconut, dried cranberries/raisins and vanilla and mix until blended.

Part Two: In a separate bowl, combine the flour, cinnamon, salt and baking soda, Add the dry ingredients to the mixer bowl until just combined.

Spoon the batter into two greased and floured 9” round pans. Bake in a pre-heated oven at 350°F for 40-50 minutes, or until the cake tests done. Toothpick method: poke the center of the cake and if it comes out clean it is done. 

Five minutes after removing from the oven, remove from the pans and allow the cake to completely cool on a rack before frosting.

Frosting: Combine the butter, cream cheese and vanilla. Beat until fluffy. Add the powdered sugar gradually until all is added and blended well. Add some buttermilk until the frosting is the desired consistency.


To frost the cake I leveled the top of one of the layers and placed it on the cake holder. Then I put a layer of frosting in the middle and placed on the top layer. I will admit I am not very good at frosting a cake so I asked my wife, Annette, if she would please finish frosting it for me. I owe her big time! I love my wife, she's the best and we've been happily married since 1979. She's as beautiful today as the day I married her.


How to Order One of My Sourdough Starters: For a description of all seven of my starters please go to my ORDER page by clicking HERE. There you can order all 7 starters for one low price or order one single starter which now includes a second FREE starter of your choice. My contact info is there as well if you have any questions.

Tuesday, July 29, 2014

Sourdough Chocolate Cake Divine


There is more to sourdough than bread and this Chocolate cake recipe is a prime example of what you can do with sourdough. The beauty of it is it does not taste really like sourdough thanks to the cocoa but the sourdough does enhance the flavor and this is a very moist cake as well. If you like chocolate cake you will love this recipe. Try it, you will not be sorry. See the order link below on the right side column to order one of my sourdough starters.


The Cake
1 Cup Wasatch Willy's Sourdough Starter (Fed and bubbly)
1 Cup Milk
2 Cups Unbleached All-Purpose Flour
1-1/2 Cups Granulated Sugar
1 Cup Vegetable Oil
2 teaspoons real Vanilla extract
1 teaspoon salt
1-1/2 teaspoons Baking Soda
1/2 Cup Hershey's Special Dark Cocoa
1/4 Cup Hershey's Cocoa
2 Large Eggs, farm fresh

The Frosting
6 Cups Powdered Sugar
3/4 Cup Butter, Softened
1/2 Cup Buttermilk
1/3 Cup Stephen's Cherry Chocolate Powder
1/3 Cup Hershey's Special Dark Cocoa
1 Tablespoon Hot Water

Drizzle for the Sizzle
1/3 Cup Dark or Semi-sweet Chocolate Chips
1 Tablespoon Milk
1 Tablespoon Corn Syrup

Preheat your oven to 350F.


The Fresh Egg Provider


The Cake
In your mixer bowl, combine the Wasatch Willy live and active starter, milk and flour. Mix until just combined. Cover and rest for 2-3 hours. Don’t worry if it is not bubbling but it should have doubled in size. 

In another bowl beat together the sugar, vegetable oil, vanilla, salt, baking soda and cocoa. Add the eggs one at a time and beat well after adding each one. In the picture lower left I show three eggs. This is because they are medium-sized and from one of my Leghorn hens. They are among her first eggs ever layed.

Gently fold the two bowls into one until the combined mixture is smooth and immediately pour into two greased and floured 9” pans. Tap out the bubbles quickly and place the pans immediately in the oven.

Bake in a pre-heated oven at 350°F for 30-40 minutes, or until the cake tests done. My oven took exactly 30 minutes. I set it to 25 and tested. Toothpick method: poke the center of the cake and if it comes out clean it is done.  After removing from the oven, remove from the pans and allow the cake to completely cool on a rack before frosting.  

FROSTING: Sift the powdered sugar in a large mixing bowl. Hershey’s Special Dark Cocoa powder, Stephens Gourmet Hot Cocoa Cherry Chocolate powder, add the butter and buttermilk. Mix well. Add hot water a few drops at time until frosting is of the consistency you prefer. Frost the cake when cool.

You can try other frostings as well, whichever you prefer the most, the possibilities are endless.

Drizzle: Combine the Drizzle ingredients in a large coffee mug. Microwave until the chips soften and then stir until smooth. Drizzle or drip over the icing for a creative effect! I find that it is helpful to squirt the drizzle onto the cake otherwise you get blobs.

Hint: If you use the Cherry Cocoa from Stephen's as I did, prepare the cocoa in a bowl by itself and add 1 Tablespoon boiling water and stir. I find not doing that leaves the frosting a little grainy.

Top with a cherry and enjoy! If only I had thought of that the other day at the store....

To Order My Starters:
Go to my ORDER page and you can see a description of all my starters. You can also get there by clicking here. Contact info is also listed on the order page as well.

Special Thanks: I want to thank my daughter, Jennifer, for all her help. Without it this recipe and blogpost would not be possible.

Other Thoughts: My grand daughter, who normally does not like sourdough, likes this recipe and was blown away after sampling it because I sort of forgot to mention the sourdough part when she was sampling it.

8/5/2014 My daughter made this for my birthday and used the Cream Cheese Frosting from the Carrot Cake recipe. It was pretty darn good. So much for weight loss and all. Well, birthdays only come once a year! Right?